Alert Rules
Introduction
Alert rules are the rules that are sent to the email ids or phone numbers if the specific condition is matched for the particular sensor or sensor type parameters.
When we create alert rules in sensor types, the alert rule is applied to all the sensors that are part of the particular sensor type.
When we create alert rules in sensors, the alert rule is applied to the particular sensor.
To create the alert rules, we have to go to the settings tab from the side bar.

Then we have to select the particular project for which we have to create the alert rules.

The Alert rules list contains name of the rule(Rule name), date it was created(Created at), severity, alert actions, status, and action buttons

Creating an Alert rule
Now to create an alert rule, we click on the Add rule button.

Clicking on this button will open a modal. The Add alert rule modal contains three sections: Details, Conditions, and Actions.

In the first section named “Details,” we have to add the alert rule name, rule severity(Low, medium, or high) and the message.

In the next section named Conditions, there are two tabs: policy and grouping.
In the policy tab, we have to select the sensor or sensor type and then select the parameters of the particular sensor or sensor type. In the parameter sections, we have 3 options, i.e.
- Send an alert when data is outside the bound range.(In this section, we define the parameter’s upper and lower bounds.)
- Send an alert if the data exceeds the upper limit.(In this we define the upper value for the parameter).
- Send an alert if the data falls below the lower threshold. (In this, we define the lower value for the parameter).
If the condition is matched with the selected dropdown, then the alert rule will be fired.
After adding the policy, click on the Next button.

In the grouping tab, we can fire alerts in the groups at a particular time interval.
After adding the grouping time interval, first click on Done at the top right corner, then click on the Next button at the bottom right corner.

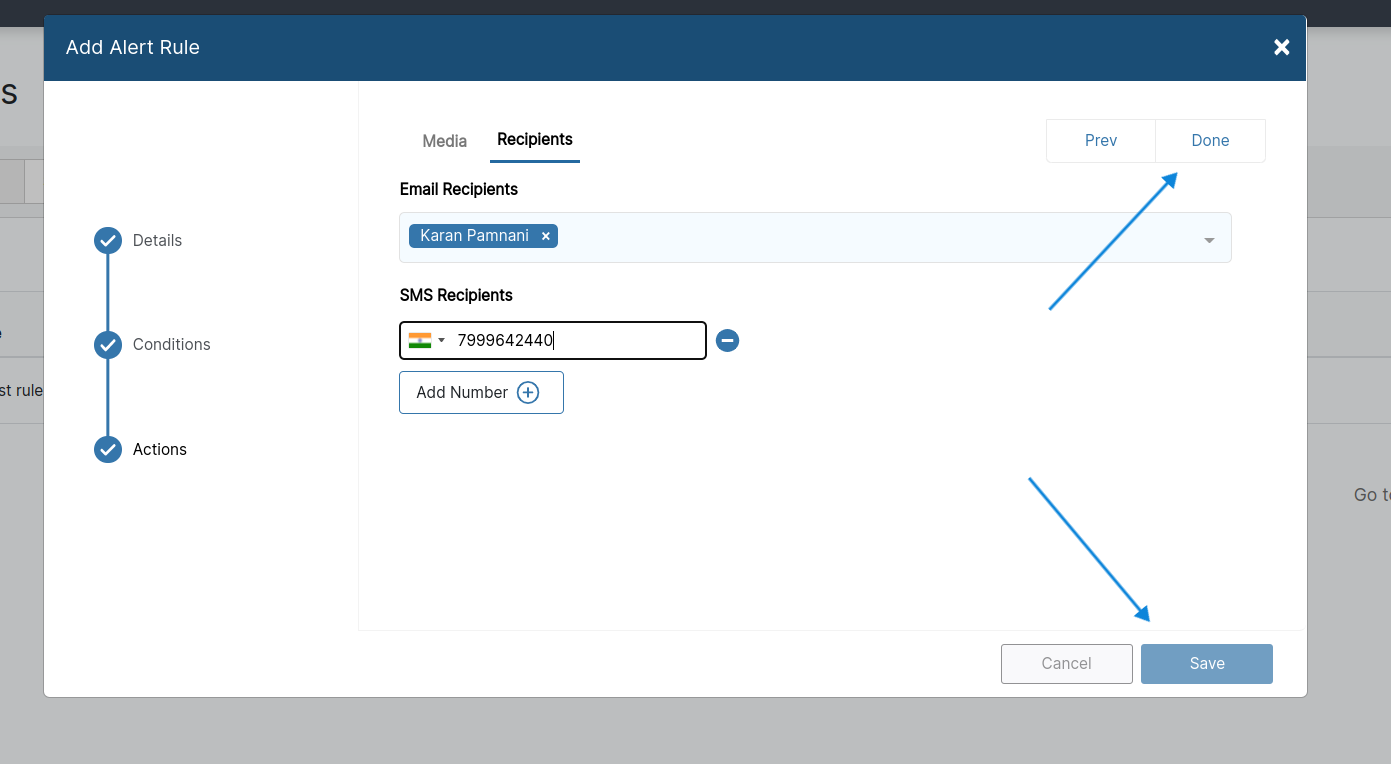
In the last section named Actions, there are two tabs: Media and Recipients.
In the Media tab, we can select how we want to send the alerts via SMS or email.
After selecting the media, click on the Next button, which is at the top right corner.

In the Recipients tab, we can add phone numbers or email IDs where the alert rules will be sent.
After adding the recipients, click on the Done button at the top right corner and then click on the Save button to add the alert rule.
This is how we create alert rules.
Editing a Alert rule

Clicking on edit alert rule button will open up a modal. The modal contains three sections: details, conditions, and actions.

In the first section named “Details,” we can edit the alert rule name, rule severity(Low, medium, or high), and the message.


If we want to change the policy or grouping interval for the alert rule, then we have to click on the second section, i.e., condition, and then we can edit the parameters condition and also the time interval for grouping alerts.


And if we want to edit the media or recipients, then we have to click on the third section, i.e., actions, and then we can add or remove the media and recipients.
After entering the details, clicking on the save button will edit the alert rule for us.
Deleting a Alert rule

Clicking on the delete alert rule button will open up a confirm modal.

If we click on yes, then the specific alert rule will be deleted.